.svg)
Effective Methods for FDM Tolerance Verification

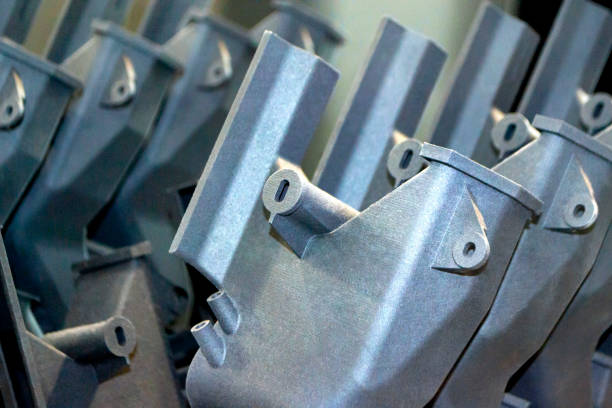
In the world of 3D printing, precision is everything. Achieving the perfect fit between printed components can be the difference between a successful project and a frustrating failure.
For manufacturers and machine shops relying on Fused Deposition Modeling (FDM) technology, ensuring dimensional accuracy is a top priority. This is where FDM tolerance verification comes into play—a crucial process for assessing and optimizing the fit of 3D printed parts.
In this comprehensive guide, we'll dive deep into the essentials of FDM tolerance checking. We'll explore the significance of accurate tolerances, outline a step-by-step approach to verifying dimensions, and share expert tips for achieving precise fits in your FDM prints.
What is FDM Tolerance Verification?
FDM tolerance verification is the process of assessing and ensuring that the dimensions of 3D printed parts meet the intended design specifications. It involves a series of steps to measure, analyze, and optimize the accuracy of FDM prints, ultimately ensuring that components fit together seamlessly in assemblies or mechanical applications.
Accurate tolerance checking is crucial for parts that require precise fits, such as gears, bearings, or interlocking mechanisms. Even slight deviations from the designed dimensions can lead to performance issues, assembly difficulties, or complete failure of the printed component.
By verifying tolerances, manufacturers can identify potential issues early in the production process, make necessary adjustments, and ensure consistent quality across their FDM prints. This proactive approach saves time, reduces waste, and enhances the overall efficiency of the manufacturing workflow—benefits that forward-thinking companies like Phasio specialize in delivering to their clients.
How to Perform FDM Tolerance Checking
Precision in FDM 3D printing is crucial for ensuring parts fit together seamlessly in assemblies. Implementing an effective tolerance checking process enhances the production workflow, reducing errors and improving overall quality. By following a structured approach, manufacturers can address dimensional accuracy with greater confidence.
Initiate the process by choosing a suitable testing model—calibration cubes and tolerance gauges are ideal for this purpose. These models serve as a reference point to evaluate dimensional discrepancies, allowing you to identify and address potential issues in the printing process. Once you've printed these models, use precise measurement tools to capture any deviations from the intended design, providing a clear picture of the print's performance.
The next phase involves a thorough measurement and analysis. Record the critical dimensions of the printed model and compare them to the initial design specifications. This comparison reveals how factors like layer height and material properties impact the final output. Adjusting print settings based on these insights—such as optimizing temperature or modifying print speed—facilitates enhanced dimensional precision. This iterative method of testing, measuring, and refining ensures that your prints meet the desired standards, thereby improving the efficiency and reliability of your manufacturing operations.
Step 1: Select the Appropriate Testing Model
Initiating FDM tolerance verification requires a strategic selection of the testing model, laying the groundwork for assessing dimensional precision. Opt for models that incorporate features specifically designed to challenge and validate your printer's performance in real-world scenarios. These models should include elements capable of revealing potential inaccuracies, such as varied geometries or intricate patterns.
Consider using complex geometrical shapes or assemblies with interlocking parts to rigorously test your printer's capabilities. These designs provide deeper insights into how well the printer manages intricate details, essential for applications demanding high precision. By choosing models that reflect the typical challenges encountered in your projects, you set a robust standard for evaluating and enhancing print accuracy.
When designing or selecting a testing model, tailor it to simulate the specific conditions your prints will face. For instance, if your projects involve detailed mechanical components, choose models that test fine tolerances and moving parts. This tailored approach ensures that the testing phase effectively highlights areas for refinement, allowing for continuous improvements in print quality and dimensional accuracy.
Step 2: Print the Test Model
With the testing model in hand, the focus shifts to executing a precise print run. Start by setting your 3D printer parameters, ensuring uniformity in the layer height and print speed. This consistent setup acts as a control, reducing external influences that might distort the accuracy of your findings.
During the printing process, maintain a keen watch for any irregularities such as surface defects or filament inconsistencies that could skew the results. These imperfections, if not addressed, can obscure the true performance capabilities of the printer. Quick identification and correction of such issues help maintain the fidelity of the test results.
Incorporating vigilant oversight into your procedure enhances the reliability of the tolerance verification. By methodically observing and adjusting during the print, you lay the groundwork for obtaining precise measurements and valuable insights, crucial for refining subsequent prints and achieving superior dimensional accuracy.
Step 3: Measure and Record Dimensions
Post-print, the focus shifts to an exacting evaluation of the model's dimensions. Utilize advanced measurement instruments such as laser scanners or coordinate measuring machines (CMM) for capturing detailed geometric data. These tools offer high-resolution insights vital for detecting subtle deviations in the model’s structure.
Prioritize measurements on features that critically impact the assembly and performance, like contact surfaces and alignment points. Meticulously document these data points, ensuring a comprehensive record that correlates each measurement to its respective feature in the CAD model. This thorough documentation is crucial for identifying trends and making precise modifications.
Following the data collection, set the measured values against the original design parameters. This process reveals discrepancies attributable to variables like print settings or equipment calibration. A detailed understanding of these variances enables you to refine your print process, optimizing parameters to enhance the fidelity and functionality of future prints.
Step 4: Analyze Results and Identify Issues
With your measurements complete, the next step involves a detailed exploration of the data. Begin by scrutinizing the recorded dimensions in relation to the initial design specifications. This analysis is essential for identifying deviations that might influence part functionality and performance, allowing you to target specific areas for improvement.
Focus your examination on prevalent issues such as thermal deformation, material contraction, and misalignment of layers. Thermal deformation often arises from inconsistent cooling, affecting the part’s geometry and flatness. Material contraction can result in dimensional reduction, impacting the assembly fit. Misalignment between layers is typically caused by mechanical inconsistencies, such as miscalibrated motors, leading to inaccuracies in the finished product.
Consider the broader implications of these findings on the part's application. Evaluate how these deviations might affect the assembly process, structural integrity, or visual appeal. Understanding the impact of these issues allows you to prioritize adjustments that will significantly enhance FDM dimensional accuracy, thereby improving the consistency and reliability of your 3D printing operations.
Step 5: Adjust Print Settings for Improvement
Fine-tuning your printer settings is essential for enhancing FDM print accuracy and quality. Start by analyzing insights from your tolerance measurements to identify specific areas needing optimization. The extrusion temperature significantly influences material flow and layer adhesion—if issues with bonding were noted, adjusting the thermal settings can enhance filament deposition and minimize warping.
Speed and Layer Height Adjustments: Consider altering print speed and layer height for improved detail capture. Slowing down the print speed can enhance the precision of complex geometries, allowing the filament adequate time to fuse properly. Adjusting layer height to a finer resolution captures intricate details more effectively, although it may extend print duration. Striking a balance between these factors is crucial for a refined blend of precision and production efficiency.
Make these adjustments incrementally, observing each print iteration for enhanced dimensional accuracy. A methodical approach ensures each modification contributes positively to print quality without introducing new variables. This systematic refinement, guided by empirical data, enhances the reliability of your FDM prints, leading to consistent and dependable production outcomes.
Step 6: Re-Test and Validate
With the adjustments calibrated, proceed to execute another print cycle of the testing model. This stage is pivotal in assessing whether the revised settings translate into enhanced dimensional fidelity. As the print unfolds, closely observe the process to confirm that the changes are contributing positively to the overall quality and stability of the output.
Once the model is printed, conduct a detailed examination using advanced measurement tools. Focus on capturing the dimensions with precision, particularly in areas that were previously identified as needing improvement. Consistency in the measurement approach is crucial to ensure the reliability of your findings and to facilitate a meaningful comparison with earlier data.
Finally, analyze the new set of measurements against both the initial specifications and previous results. This systematic approach verifies if the refinements have successfully reduced inaccuracies. By embedding this cycle into your standard workflow, you establish a continuous improvement mechanism, bolstering the reliability and effectiveness of your FDM printing operations.
By implementing a rigorous FDM tolerance verification process, you can elevate the precision and reliability of your 3D printed parts. Embracing this approach not only enhances the quality of your outputs but also streamlines your manufacturing workflow, saving time and resources in the long run. If you're ready to take your FDM printing to the next level, schedule a demo or try the platform to experience how we can help you achieve unparalleled accuracy and efficiency in your manufacturing operations.